Introduction
Get Started with LaunchFlow
LaunchFlow is an open source Python SDK that lets you deploy websites, APIs, and other applications to AWS / GCP with minimal configuration. See the welcome page for an overview.
Follow this guide to launch a FastAPI app to ECS Fargate on AWS or Cloud Run on GCP.
1. Install LaunchFlow
Install the LaunchFlow Python SDK and CLI using pip.
1pip install "launchflow[aws]"
2. Setup your local environment
Initialize LaunchFlow
Use the CLI to set up your local workspace.
1lf init --backend=local
Running the command will create a launchflow.yaml file that looks like this:
1project: your-project-name
2backend: file://.launchflow
The --backend=local flag tells LaunchFlow to store configuration and state information locally. You can also use a cloud storage like Google Cloud Storage, S3 (coming soon), or LaunchFlow Cloud.
You can learn more about it in the launchflow.yaml docs.
Authenticate with Cloud Providers
LaunchFlow uses your local AWS credentials to manage and provision resources. We recommend using the AWS CLI to authenticate with your AWS account. Once you have the CLI set up, run the following command to make sure you're authenticated:
1aws sts get-caller-identity
3. Launch Your Application
Create a FastAPI Application
Let's start out by creating a simple FastAPI application.
main.py:
1from fastapi import FastAPI
2
3app = FastAPI()
4
5@app.get("/")
6def index():
7 return "Hello World"
To run the application locally, we need to install some dependencies:
1pip install fastapi uvicorn
Then run it with:
1uvicorn main:app --port 8080
If everything is set up correctly, you should see Hello World when you visit http://localhost:8080/ in your browser.
Deploy Your Application
Now that we have a working app, let's deploy it to the cloud!
First we'll need a Dockerfile to tell LaunchFlow how to build your application.
Dockerfile:
1FROM public.ecr.aws/docker/library/python:3.11-slim
2
3WORKDIR /code
4
5RUN apt-get update && apt-get install -y --no-install-recommends gcc libpq-dev && apt-get clean && rm -rf /var/lib/apt/lists/*
6
7RUN pip install --no-cache-dir -U pip setuptools wheel && pip install --no-cache-dir launchflow[aws] fastapi uvicorn
8
9COPY ./main.py /code/main.py
10
11ENV PORT=80
12
13EXPOSE $PORT
14
15CMD uvicorn main:app --host 0.0.0.0 --port $PORT
The only thing left to do is add the ECSFargate Service somewhere in your project directory. LaunchFlow will handle networking, security, and deployment configuration for you.
1from fastapi import FastAPI
2import launchflow as lf
3
4ecs_fargate = lf.aws.ECSFargate("my-ecs-fargate")
5
6app = FastAPI()
7
8@app.get("/")
9def index():
10 return "Hello World"
We recommend using a single infra.py file to define your infrastructure, but you are free to use LaunchFlow anywhere in your project.
We're using a single file here for simplicity.
LaunchFlow will set up a Fargate Service and Docker build pipeline for you when you run:
1lf deploy my-env
You will be able to view the plan and confirm before the resources are created. 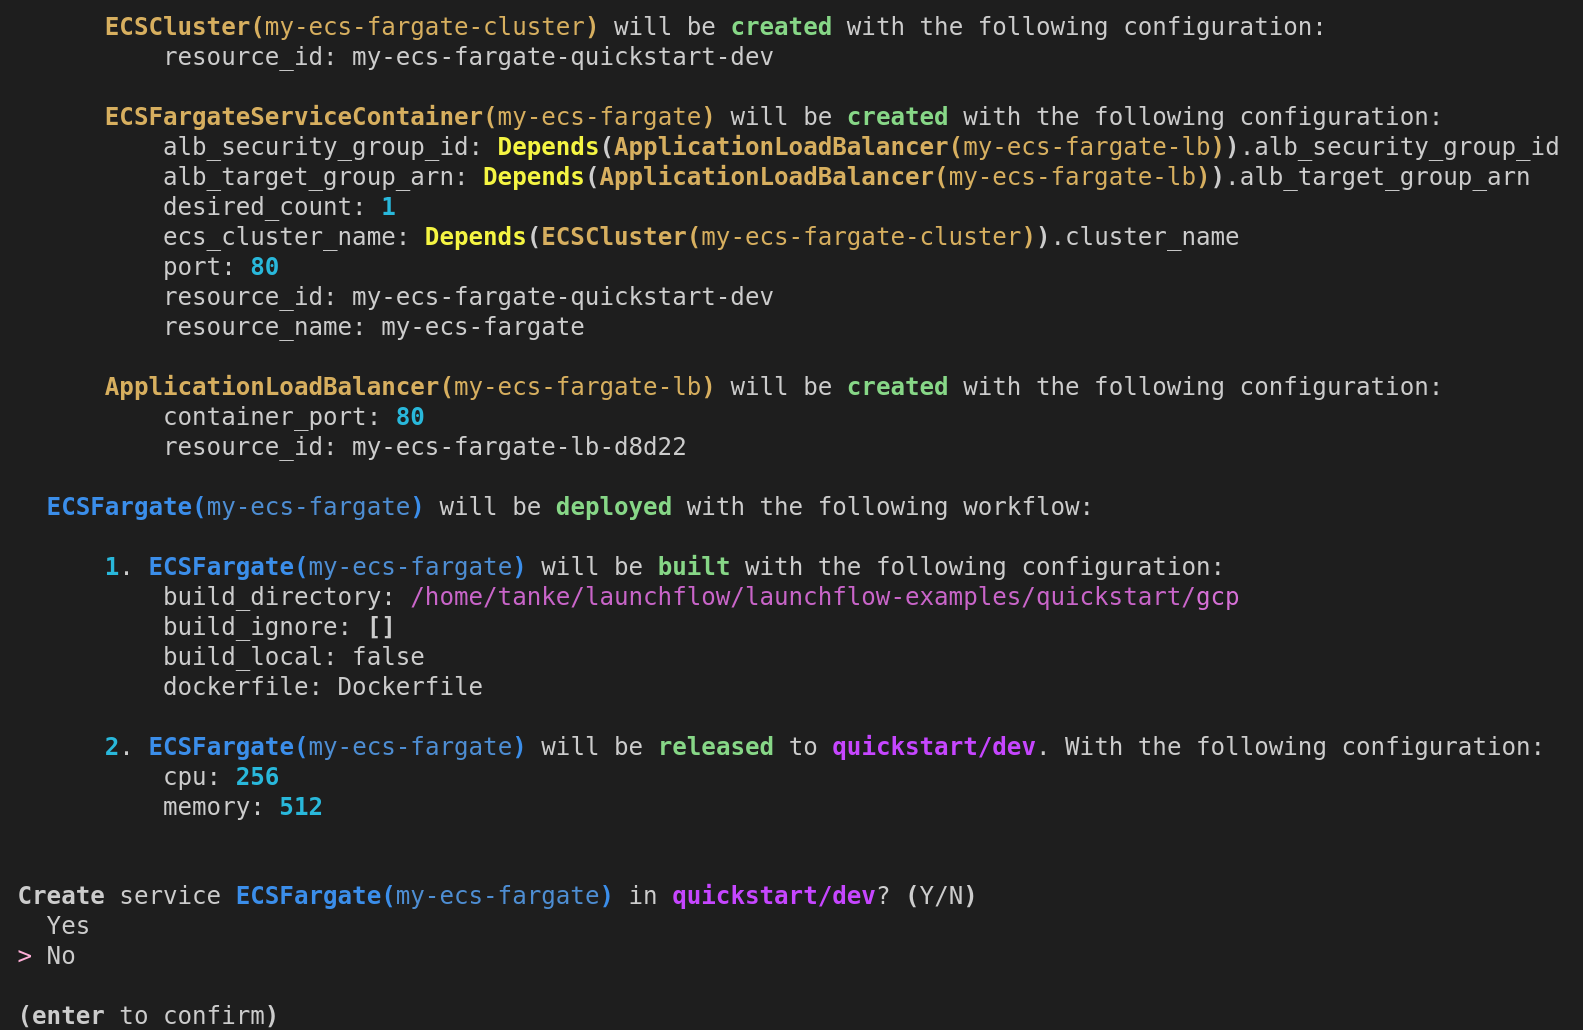
If everything goes well, you should see a link to your deployed service and logs to debug any issues that may have occurred.
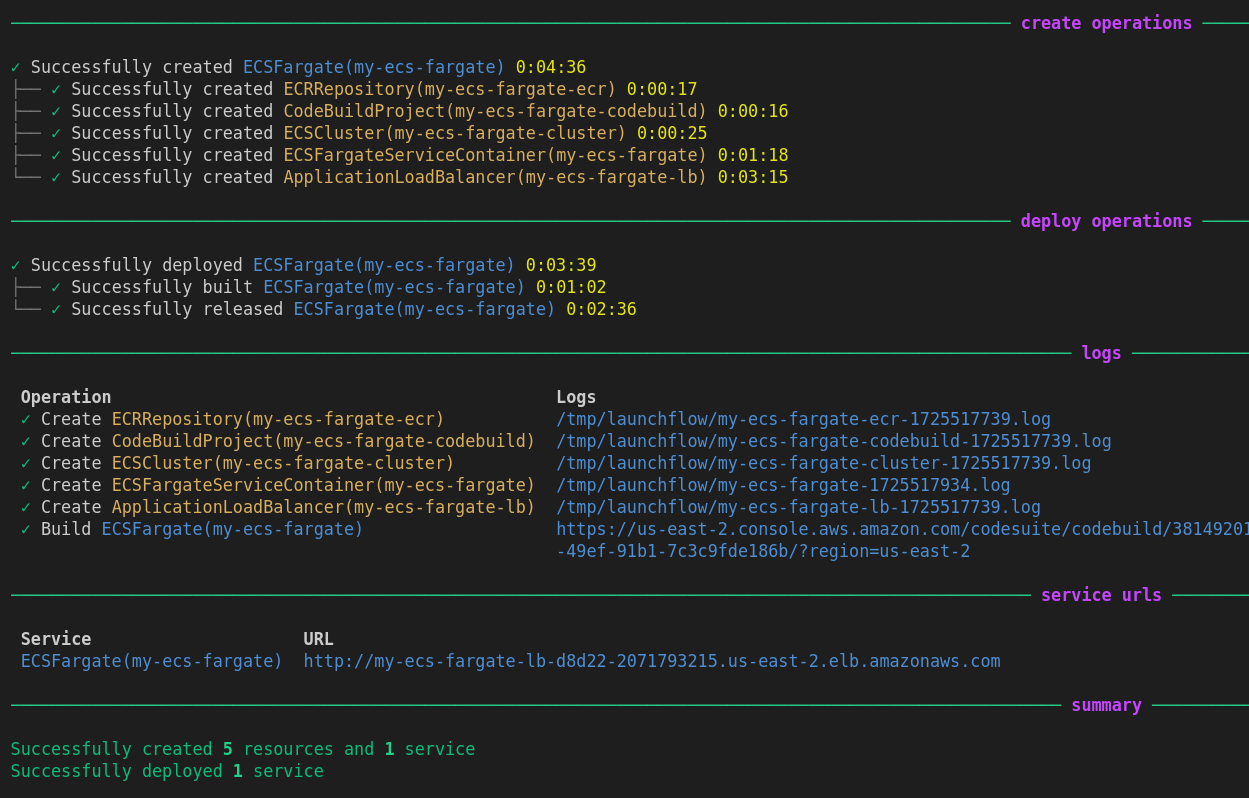
That's all there is to it!
Learn more about the deploy command here.
Add Cloud Resources
LaunchFlow makes it easy to add databases, task queues, and other cloud resources to your application. Your Services automatically have access to any Resources you create alongside them in the same Environment.
To add storage bucket to your application, simply import a LaunchFlow S3Bucket resource anywhere in your Python code. You can even use it inside your application code if you want!
main.py:
1from fastapi import FastAPI
2import launchflow as lf
3
4my_service = lf.aws.ECSFargate("my-ecs-fargate")
5
6# NOTE: The bucket name must be globally unique
7bucket = lf.aws.S3Bucket(f"my-get-started-bucket-{lf.environment}")
8
9app = FastAPI()
10
11@app.get("/")
12def index():
13 # Read / Write to the bucket to test it out
14 bucket.upload_from_string("Hello World", "hello_world.txt")
15 contents = bucket.download_file("hello_world.txt")
16 return contents
Rerun the lf deploy command to create the S3Bucket resource and update the ECSFargate service with the new code.
1lf deploy my-env
You can also run your application locally with the lf run command:
1lf run my-env -- uvicorn main:app --port 8080
Visit http://localhost:8080/ to see the updated response!
Switch Environments
One of the main benefits of LaunchFlow is the ability to easily replicate your application across multiple environments. To create a staging version of your application, just run lf deploy again with a different environment name:
1lf deploy my-staging-env
You can easily customize dynamic configuration across environments using the lf.environment global variable in your code.
1
2force_destroy = True
3desired_count = 1
4
5# Set different configurations based on the environment
6if lf.environment == "production":
7 force_destroy = False
8 desired_count = 2
9
10bucket = lf.aws.S3Bucket("my-bucket", force_destroy=force_destroy)
11api = lf.aws.ECSFargate("my-ecs-fargate", desired_count=desired_count)
See the GitHub Integration to learn how to automate deployments between environments on git push.
4. Visualize, Share, and Automate
LaunchFlow Cloud usage is optional and free for individuals.
Using the local backend like we did above works fine for starting a project, but doesn't offer a way to share state between multiple users. LaunchFlow Cloud is a web-based service for managing, sharing, and automating your infrastructure. It's free for individuals and provides a simple, secure way to collaborate with your team and automate your release pipelines.
Sign up for LaunchFlow Cloud and connect your local environment by running:
1lf init --backend=lf
This will create a project in your LaunchFlow Cloud account and migrate your local state to the LaunchFlow Cloud backend.
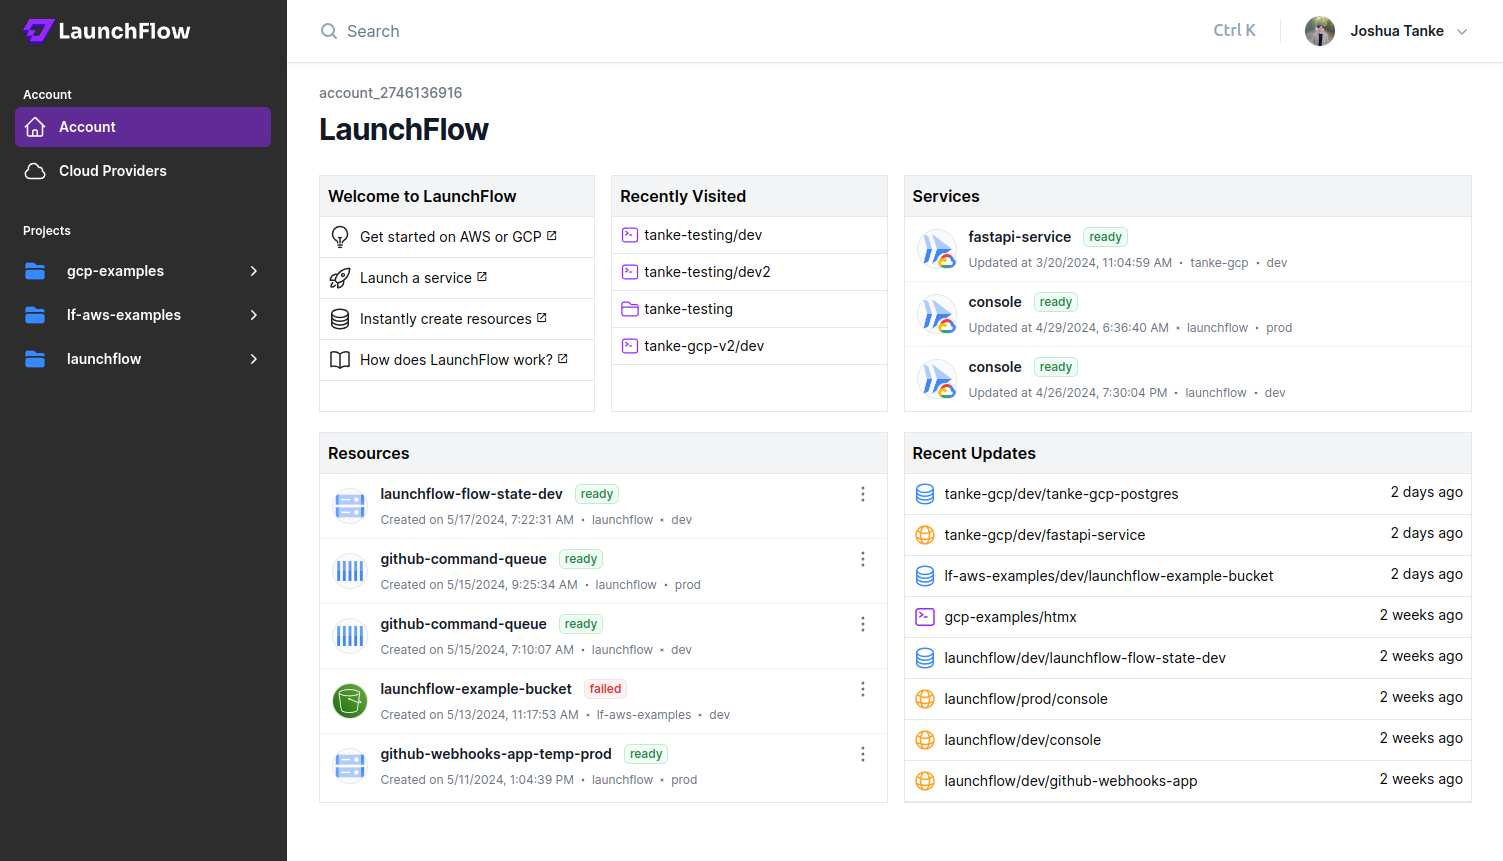
What's next?
- View your application in the LaunchFlow console
- Learn more about Environments, Resources, and Services
- Explore the Resource Reference to see all the resources you can create
- Join the LaunchFlow Slack community to ask questions and get help